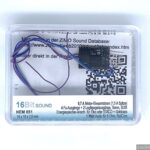
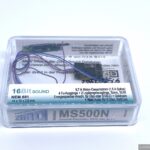
Released this year in 2021, the Zimo MS500 has been long awaited by N-scale sound fans: finally a sound decoder not bigger than any NEM651 standard decoder. Here is a quick overview.
MS500: The smallest, but also powerful
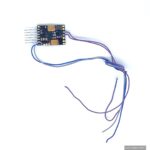
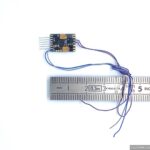
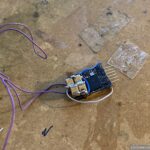
14 x 10 x 2,6mm, that’s basically the size of most standard NEM651 decoders on the market (albeit slightly higher). The Zimo MS500 fits in many engines that previously couldn’t fit a sound decoder (at all, or without extensive DIY). It’s standard length is its strength.
But that doesn’t make it less powerful. As a decoder from the recent “MS” series, it offers Zimo 16bits sound, 4 outputs + 2 unpowered outputs. Also of note, is Zimo’s new feature to connect capacitors up to 1000uF to a specific pad, without having to worry about a protection circuit (with a resistor and a diode). Additional capacity can of course be added using the aforementioned circuit, or even using Zimo’s new “STACO” module.
Zimo’s usual quality, at a price
I’ve mentioned Zimo several times. So here’s my uncensored opinion: in terms of user friendliness, they are terrible; if you’re not an engineer wannabe, then programming their decoders can be a hassle. On the other hand, as I always mention, they make excellent, very powerful products. This decoder is a testament to this, they are the first manufacturer to be able to release such a small decoder.
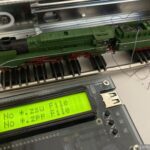
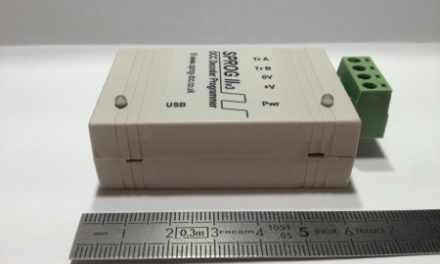
Uploading a sound project from the Zimo MXULFA programmer and a USB stick isn’t that hard. In fact, in order to promote the new 16 bits sound of the MS series, Zimo has been releasing quite a few new and free sound projects on their website. That’s a very good point.
Of course, your model train stockist may offer to upload the sound project for you, which makes it much easier.
The decoder is available with a NEM651 socket or wires.
Testing in in real life
My perfect candidate was a steam engine from Arnold that I reviewed in this article: Unboxing: Arnold BR 02 0201-0 (HN2428).
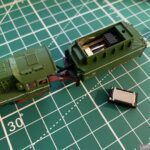
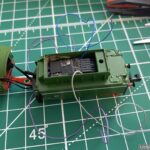
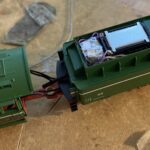
After slightly altering the tender metal casing, I was able to fit not only the MS500, but also 4 SMD capacitors as a buffer and the speaker in the tender.
The result is very satisfying. Have a look at the video on top for yourself!
Conclusion
All in all, the MS500 decoder will be the perfect solution for people looking to add sound to very small engines. In fact, it has already been used by many enthusiasts in very small N scale engines such as the famous Köf II.
Of course, you still need to find some space to fit a reasonably sized speaker. But that won’t be a challenge for the expert DIYers out there!
Reminder: I am a hobbyist and these articles only represent my personal views. I am not receiving any compensation, in any form, from the brands or stores mentioned here. The product names, marketing names, and brands mentioned here are the property of their respective owners.



Hello again Pierre from NYC.
It’s been a while since you provided valuable advice on converting my Henschel Wegman to DCC and sound. I have another question about a loco which you recently converted to sound: the Arnold BR2 0201. I also purchased the loco & Zimo MS500 which fits perfectly. My only issue is fitting a speaker with an enclosure. I found the height is too great to fit the black tender cover. How did you handle this? Did you eliminate the enclosure? Or did you find some other solution. Continuing message with another post.
I considered opening the tender to see if there was space in the tender, but looking at the documentation sketches it appeared with the motor, tender lighting & drive shaft there would be no space there either. But, judging from your photos you didn’t need to do that but somehow found room above the Zimo decoder to fit a speaker. Also, did you find that the capacitors were necessary? If so, which did you use? I’ll post this on your MS500 review as well. Many thanks, Dave
Hi Dave, thanks for the comments!
For this BR02, I did have to mill a small chunk of metal of the tender enclosure that was located right above the decoder area. Which is why in the first picture above, you can see the “rectangle” area for the decoder is fully open. It’s a relatively accessible DIY, even with a good Dremel-like tool, and since it’s a hidden area there is no big danger to damage the esthetics.
As for the speaker, I did use 15×10 speaker (if i remember correctly, but might have been 16×9). The standard enclosures don’t fit, and since I’m lucky enough to have a 3D printer, I printed a 1mm high enclosure that’s satisfying enough in terms of sound. PS: in fact, I have prep-printed many speaker enclosures with heights from 1 to 8mm to fit pretty much any of my future DIYs. It goes without saying that en enclosure is absolutely necessary, as a newbie a few years ago I tried without and obviously the sound is terrible without.
… see next message
Good afternoon from NYC Pierre. Thanks so much for the info on the converting of the Arnold BR02 to sound with a Zimo decoder. Interestingly, the placement of the six-pin interface was more to the right on my model so there was no need for me to mill the tender — thankfully! 🙂 Indeed you are lucky to have a 3D printer. I haven’t invested in one yet. However, for the speaker in order to simulate an enclosure, I place the speaker pointing upwards so the speaker was against the underside of the tender cap/cover. Because there was an angle where the left and right edges of the speaker sits, there is a bit of a natural enclosure created. So I sealed all sides with white glue, then soldered the speaker leads and reinstalled the tender cover/cap. The sound generated was very good; more than adequate even at a lower CV setting!
part 2/3
As for the caps, I find they almost always are necessary to ensure smooth sound. I always use ceramic SMD capacitors, rated 16V (my layout is at 14V, careful if your’s is higher!) or 25V. Many people use Tantal caps, sightly better, but the numerous stories of them exploding and damaging the trains have kept me at bay. I use caps rated between 47uF to 200uF (usually tested at around 40uF and 160uF respectively), trying to always achieve at least 400uF for an engine, closer to 1000uF if rooom available.
What’s interesting with the new zimos is that they have a direct capacitor connection, allowing to directly connect up to 1000uF WITHOUT the otherwise required loading circuit with a 100ohm resistor and a diode (see manual).
A word to the wise: when using 16V or 25V caps, notwithstanding the absence of a loading mechanism in the case above, i suggest always installing a protective Zener diode in parallel to the caps (16V or more) to protect your caps.
I am going to try and get along without the capacitors. I’m not very bothered if there’s an interruption in the sound going across a frog, if it happens. But thanks for the info you provided in case I decide to incorporate them. I haven’t used any capacitors in any of my loco fleet. Again, my thanks for your rapid reply. And my compliments on your site and the wonderful advice you provide to modelers. What a great community we have! I send my best wishes for a Happy, Healthy and Safe New Year.
Thanks David, I’m glad you managed to convert your model, your trick about the speaker enclosure is a great idea! Safe new year to you on the East Coast too!
part 3/3
As for the caps themselves, I’m cheap so I order them in China. But there are many ‘fake’ products. I always have found the products from this seller reliable and up to specs: https://www.aliexpress.com/item/32948154410.html?spm=a2g0o.cart.0.0.3dce3c00hnoyQx&mp=1
Beware that the 220uF actually are closer to 160uF (which is good enough), and that they also have 100uF ones that are much cheaper (probably closer to 70-80uF in real life).
Pierre